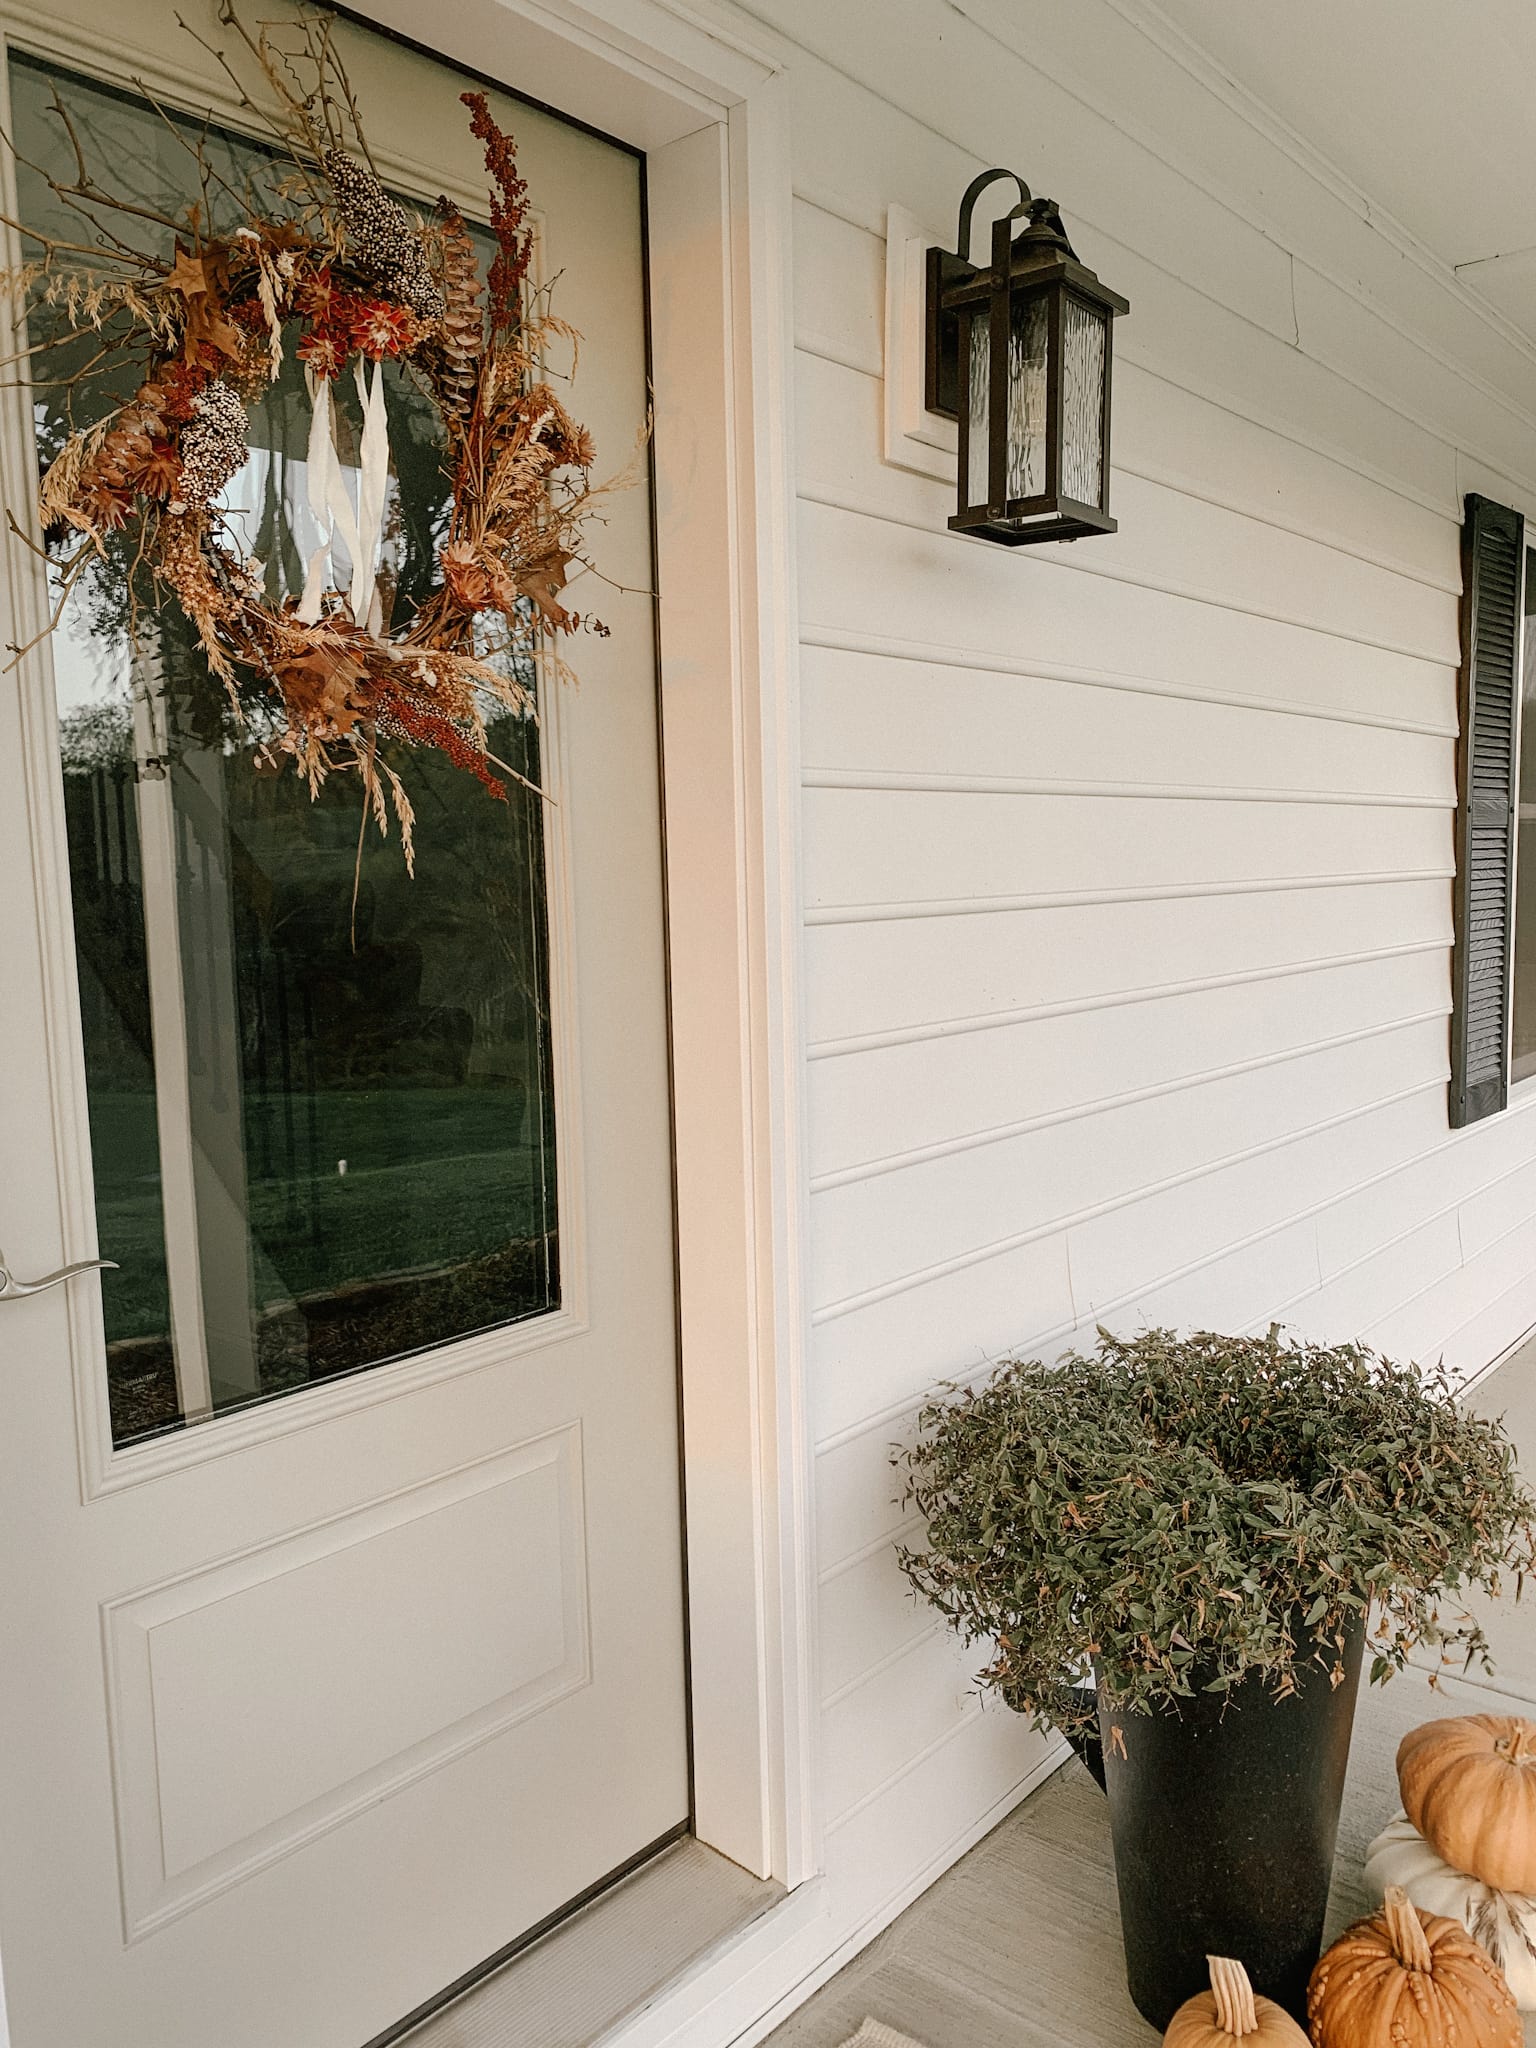
I haven’t used my creativity on a fun home decor DIY in quite some time. With an afternoon to myself and lots of leftover floral stems, I was excited to get to creating something fun! I have accumulated lots of dried stems over the years and wanted to make use of them to create a Fall dried floral wreath. This wreath cost me nothing and is one of my favorite DIYs to date!
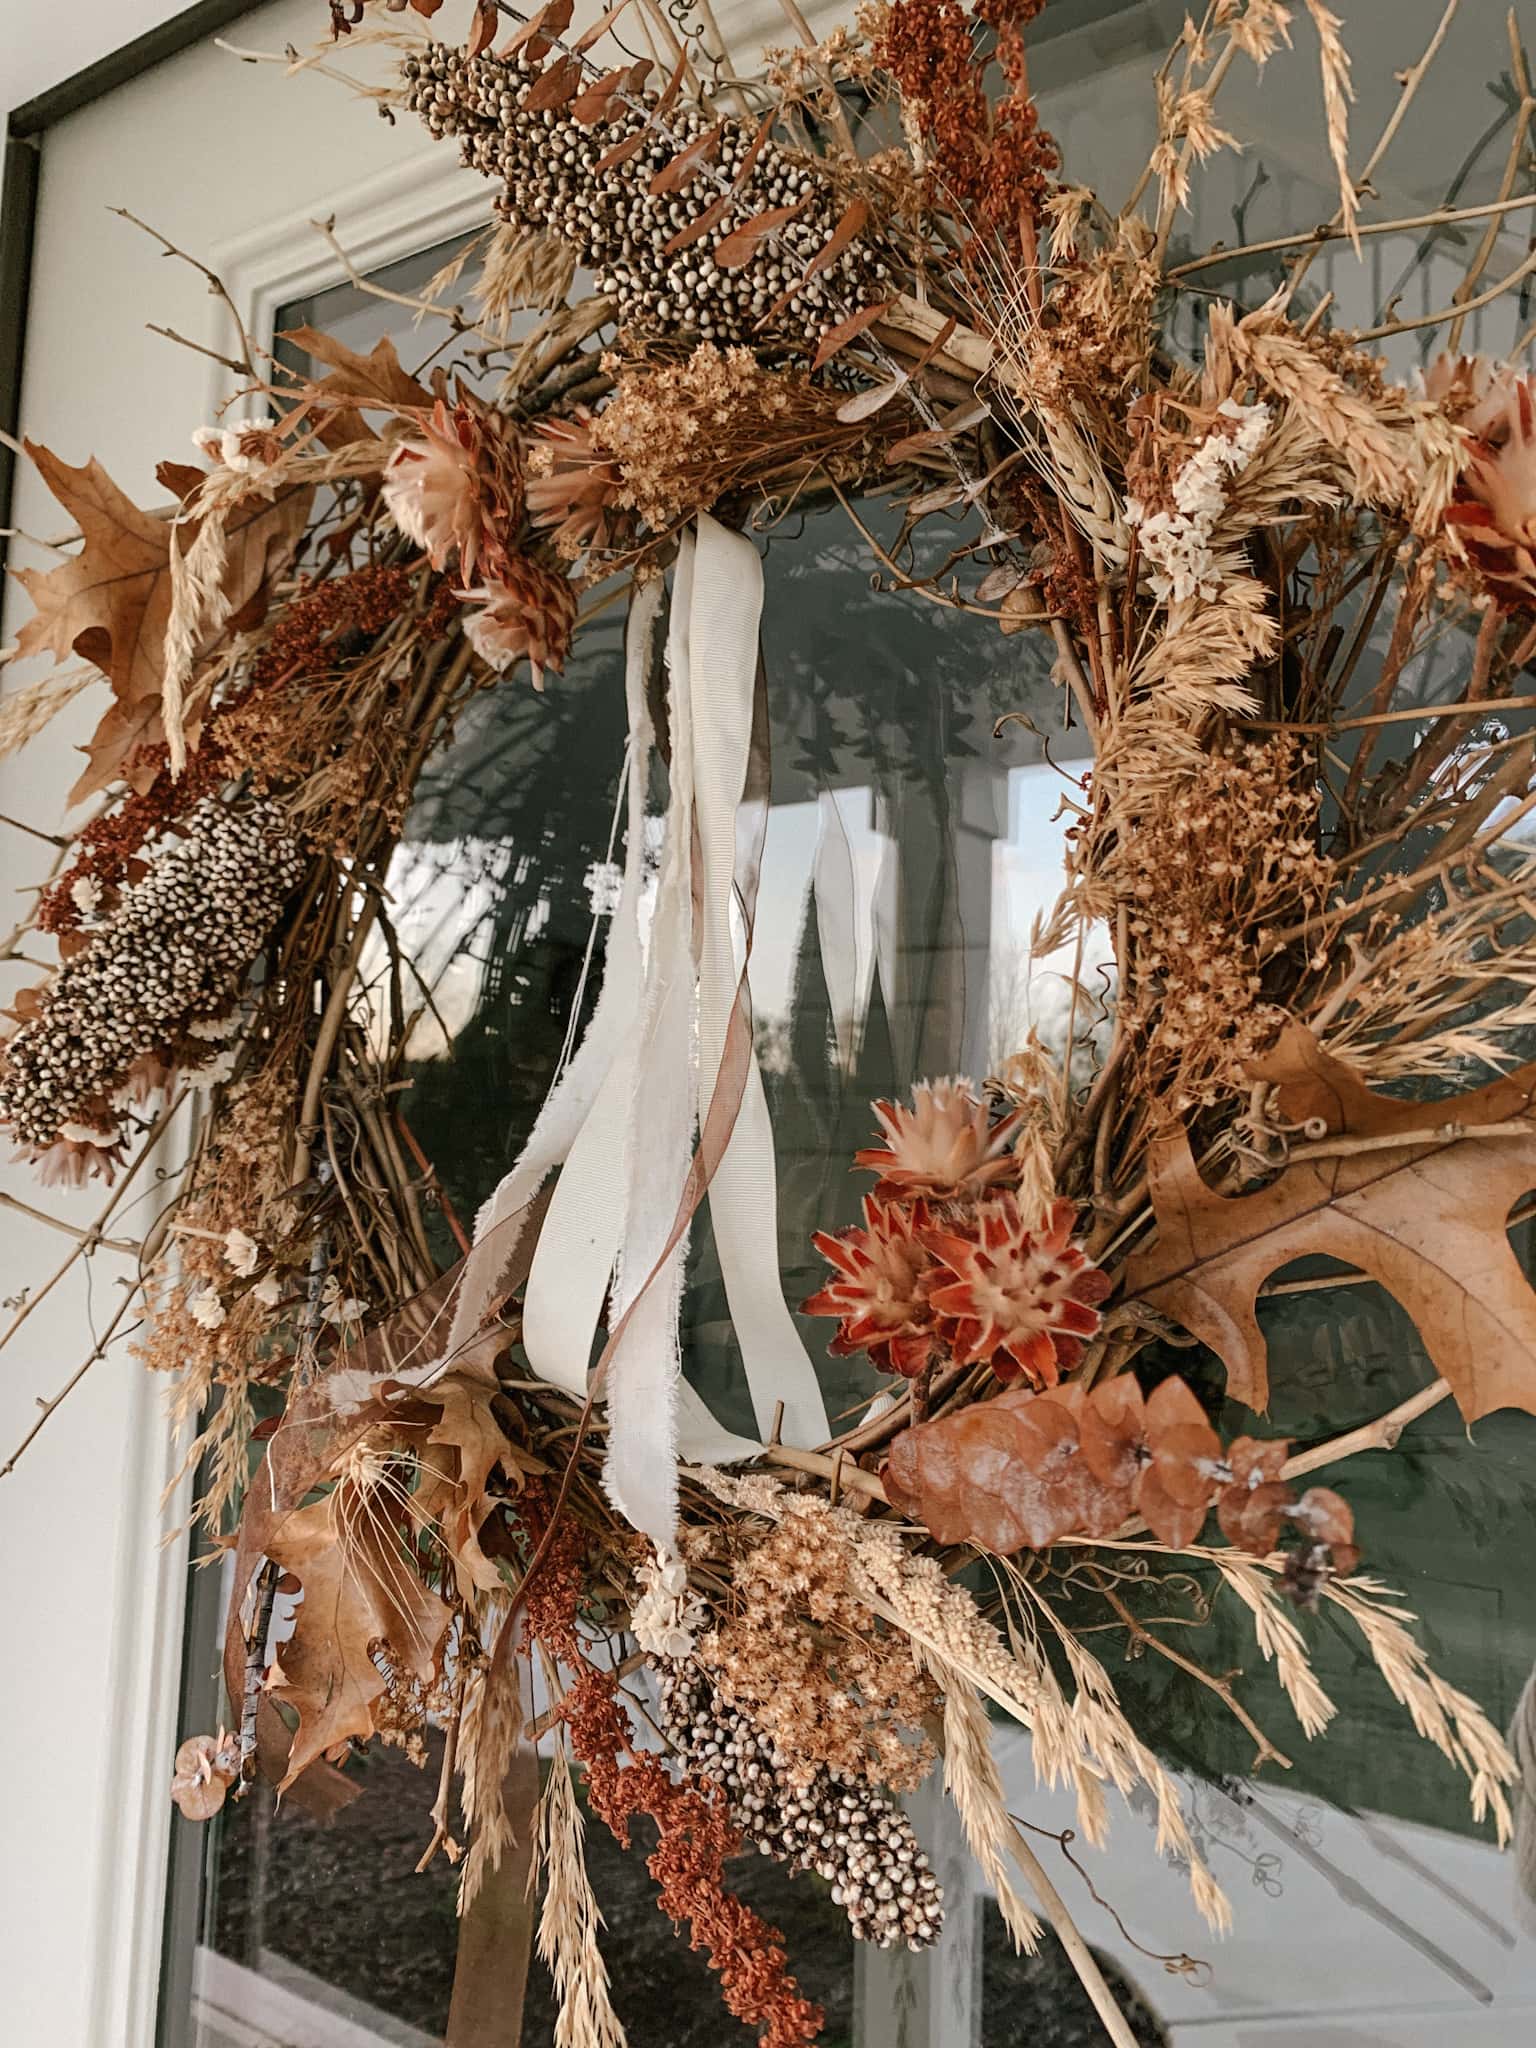
I started out with a 24 inch grapevine wreath. Luckily, I have a few of these in my storage room and was able to use one for this project. If you don’t have one handy, you can always purchase an affordable option like this one!

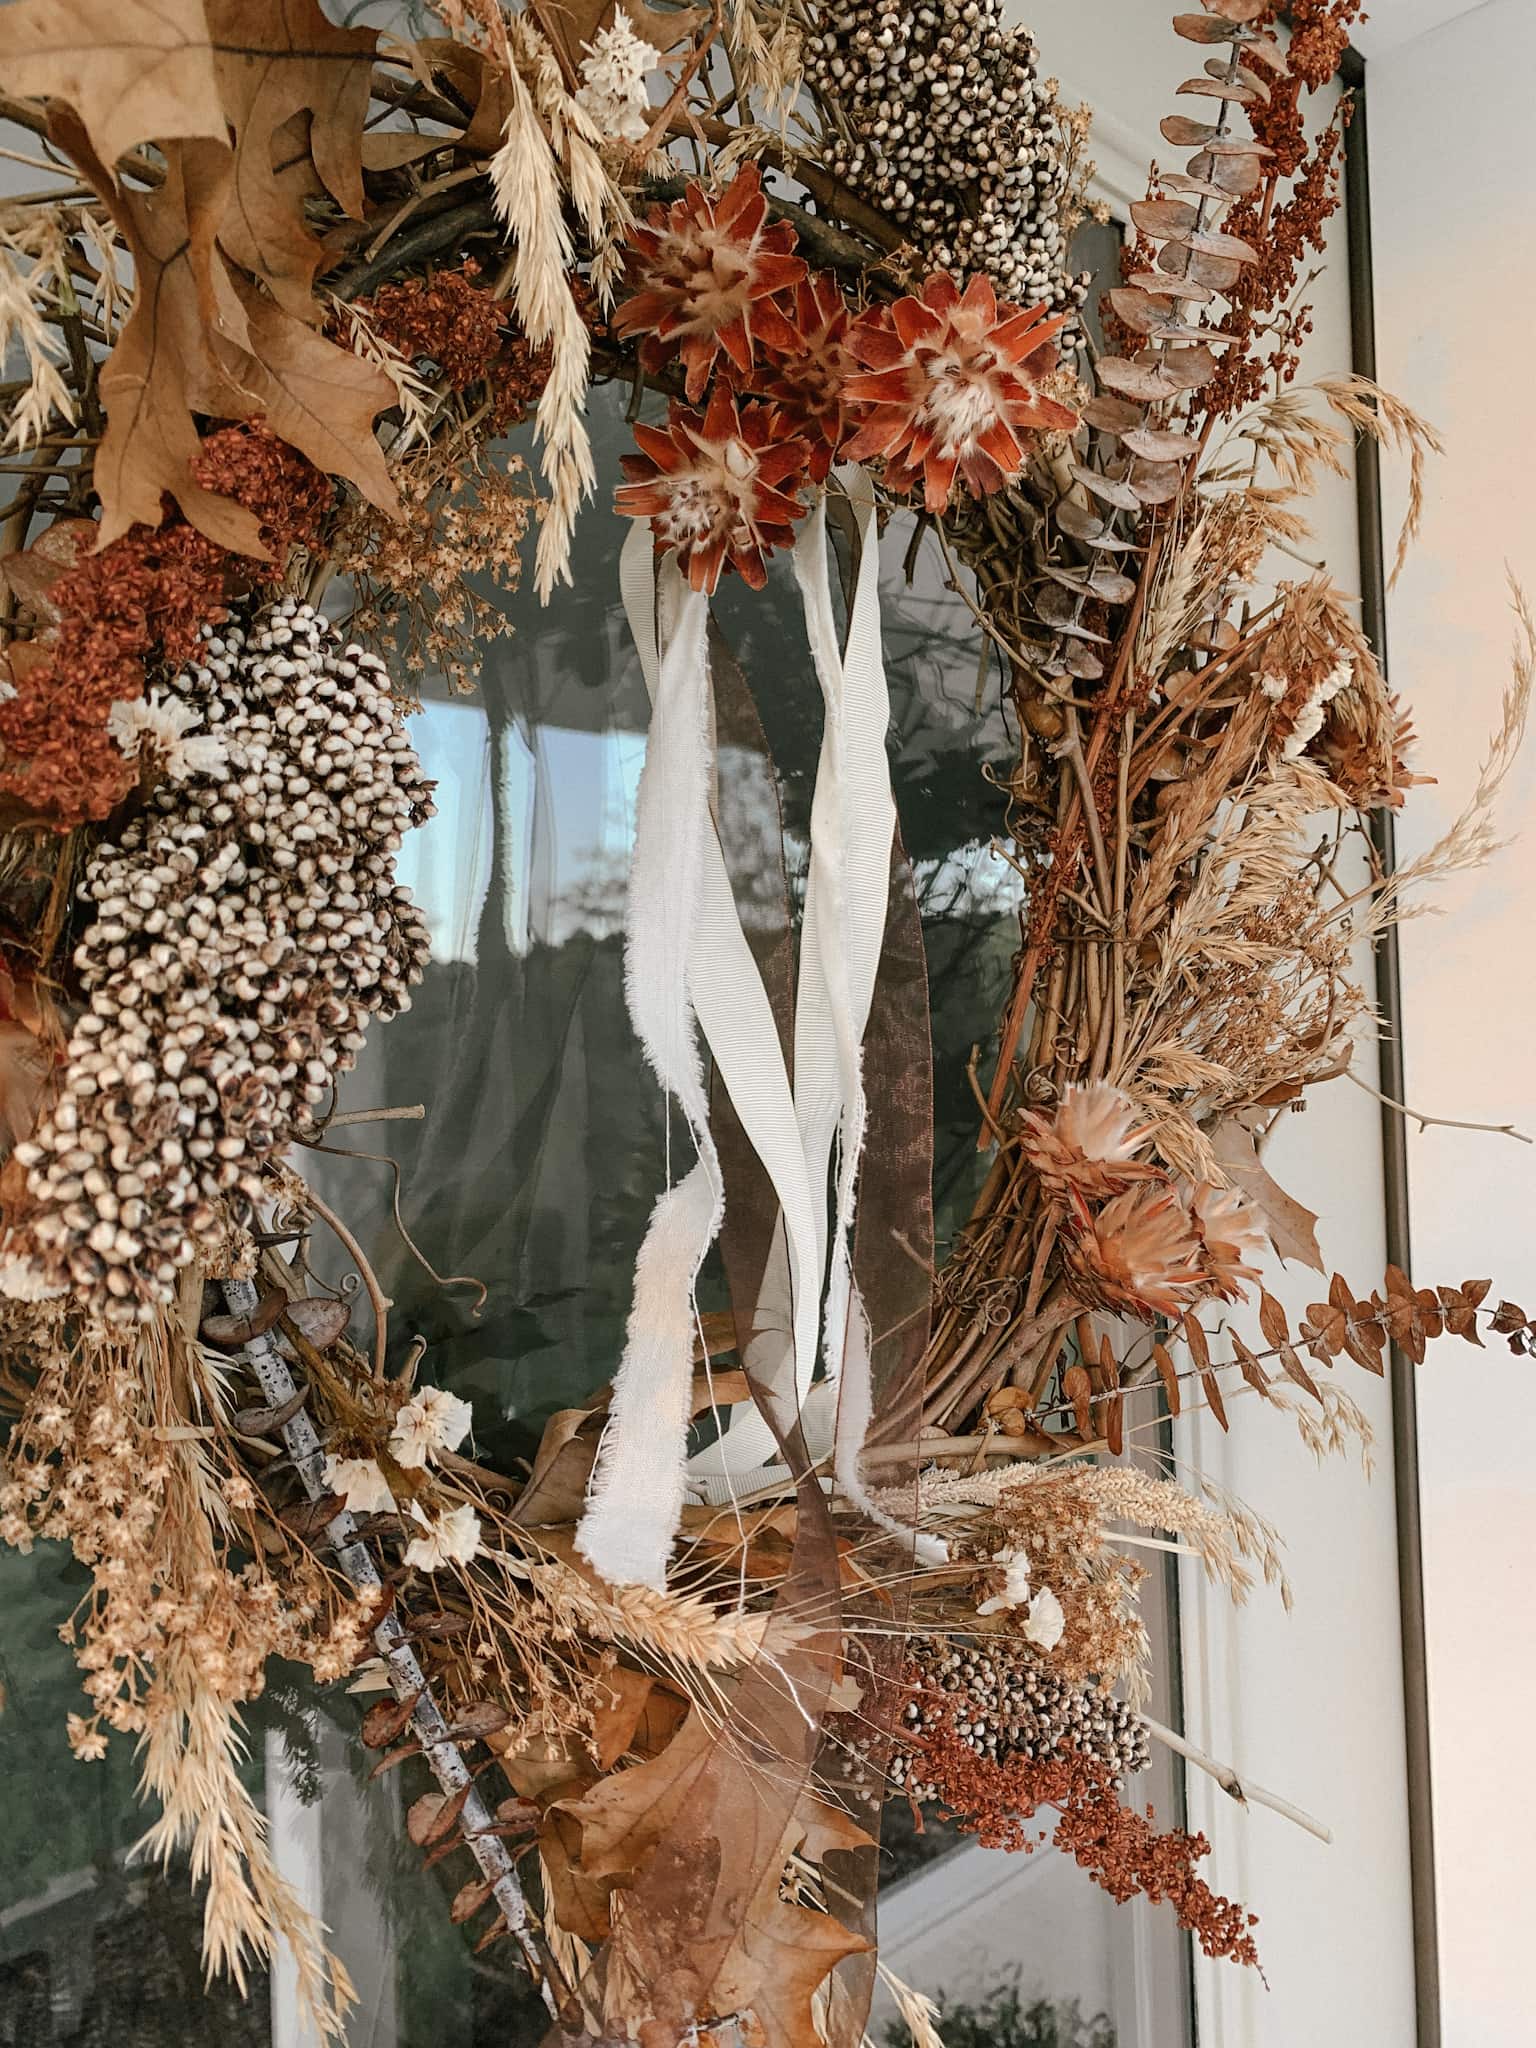
Like I mentioned earlier, I had lots of leftover dried floral and grass stems from previous projects. I also included foraged items from our yard including: twigs, leaves and wheat. I was able to mix and match what I had to create a unique combination. If you are looking to purchase some dried stems for this project, check out this post with tons of beautiful options!

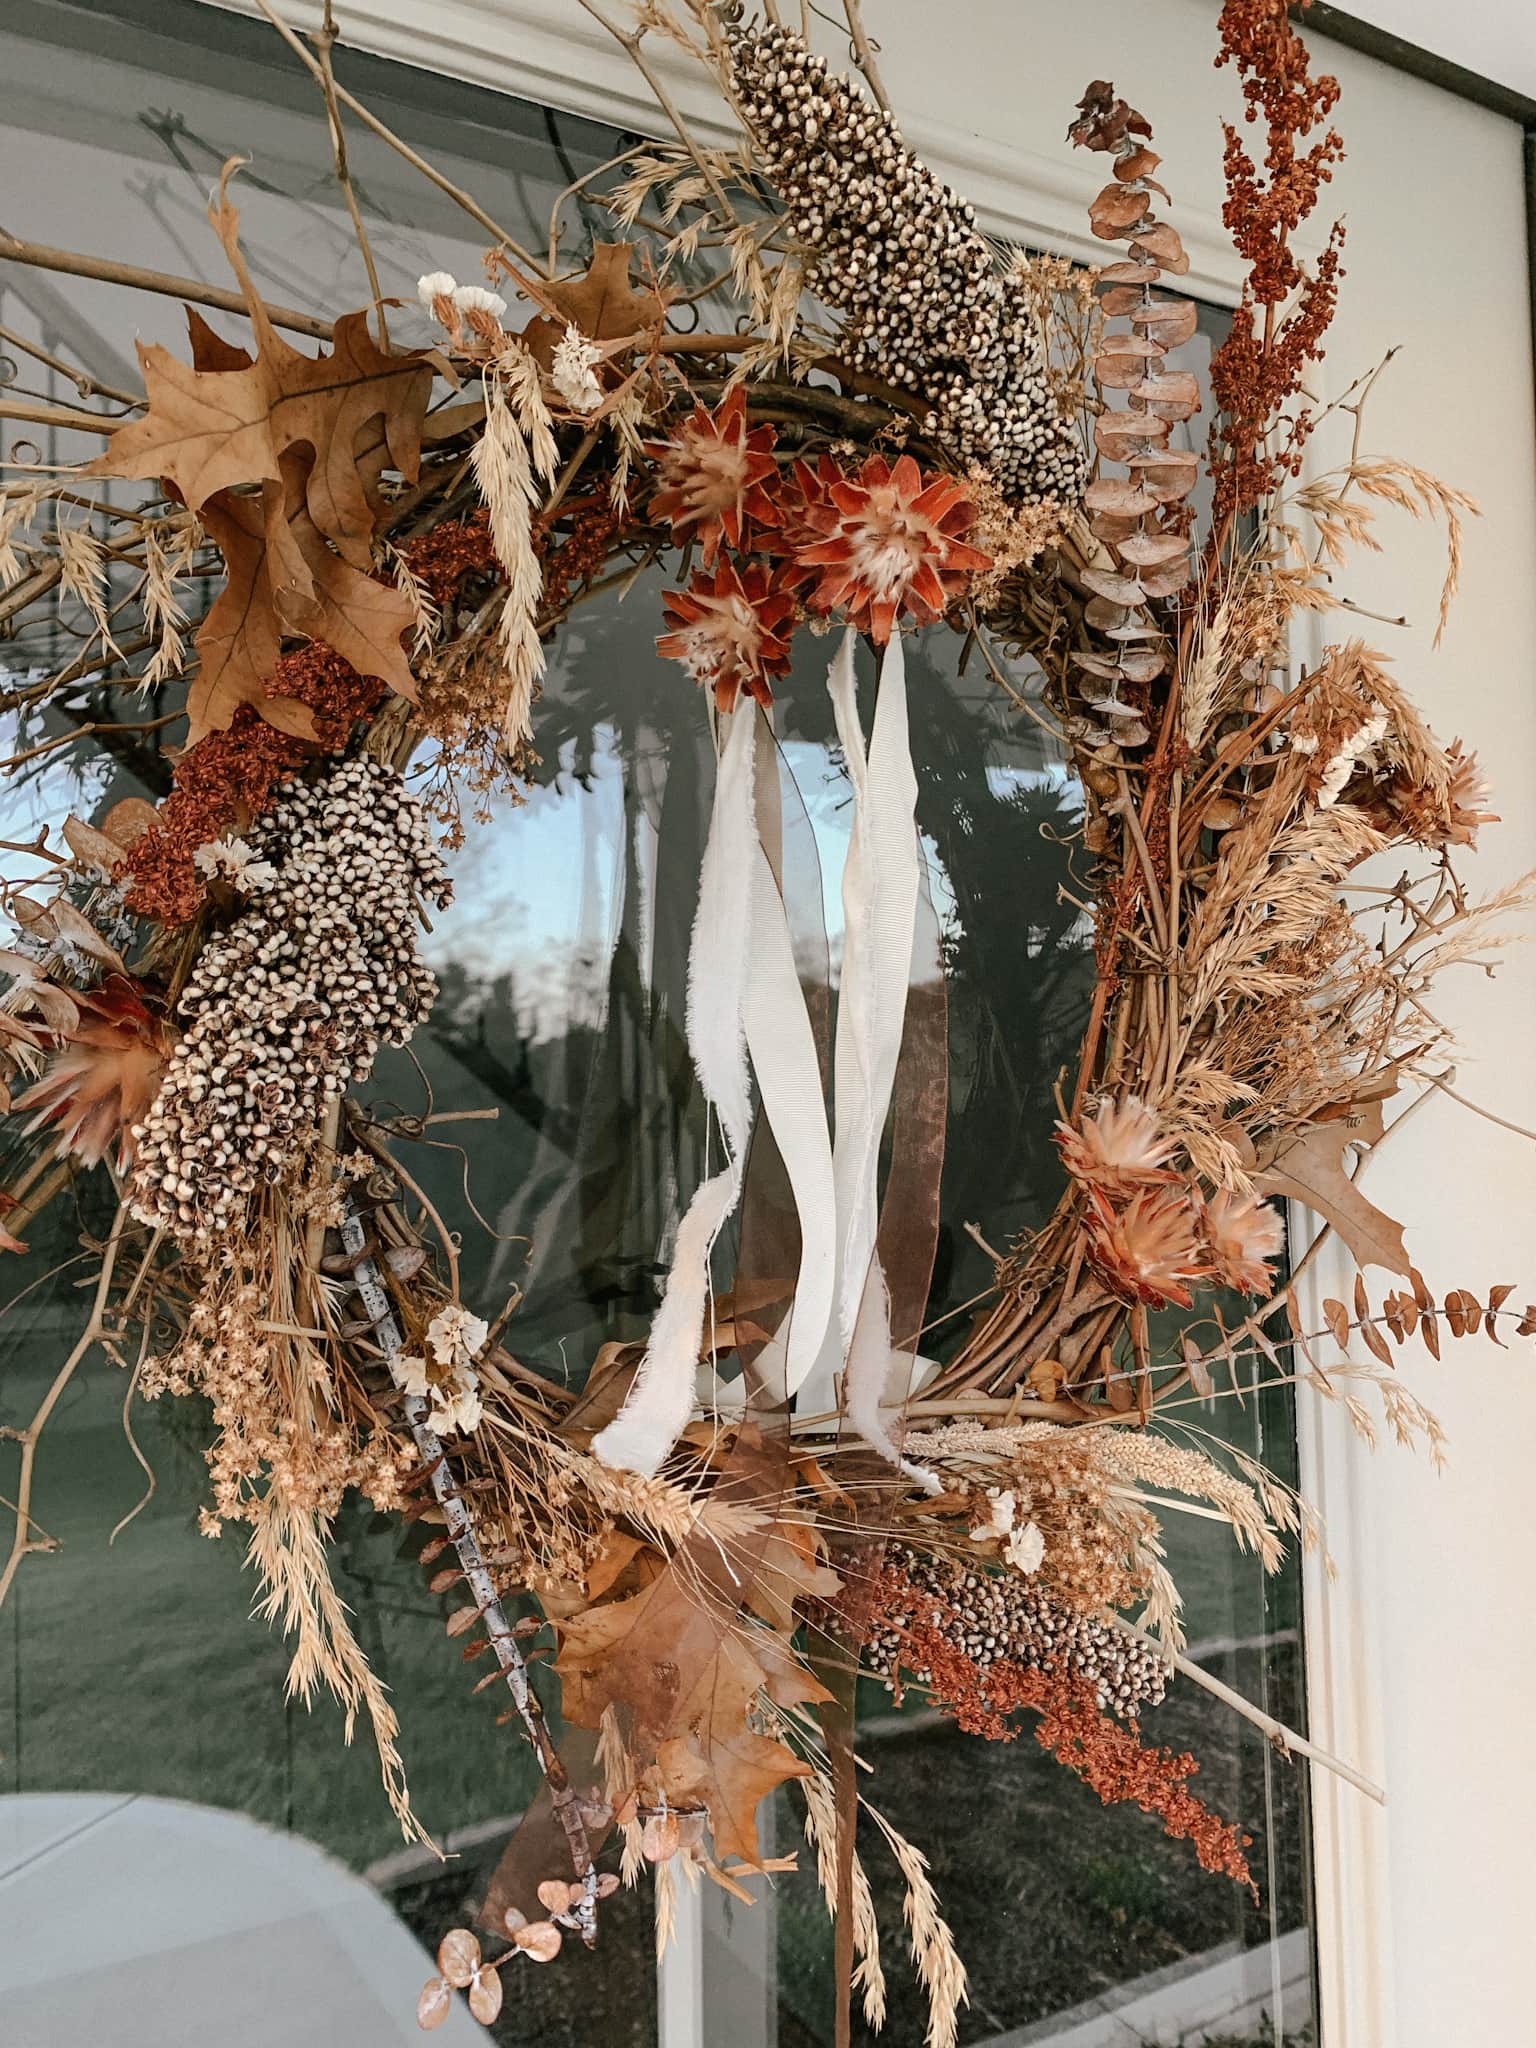
Next was the fun part! I simply grabbed a pair of scissors and started shoving the stems in between the layers of the grapevine wreath. My wreath has held up great without the use of floral wire or tape! You could always add some to make it even more secure.
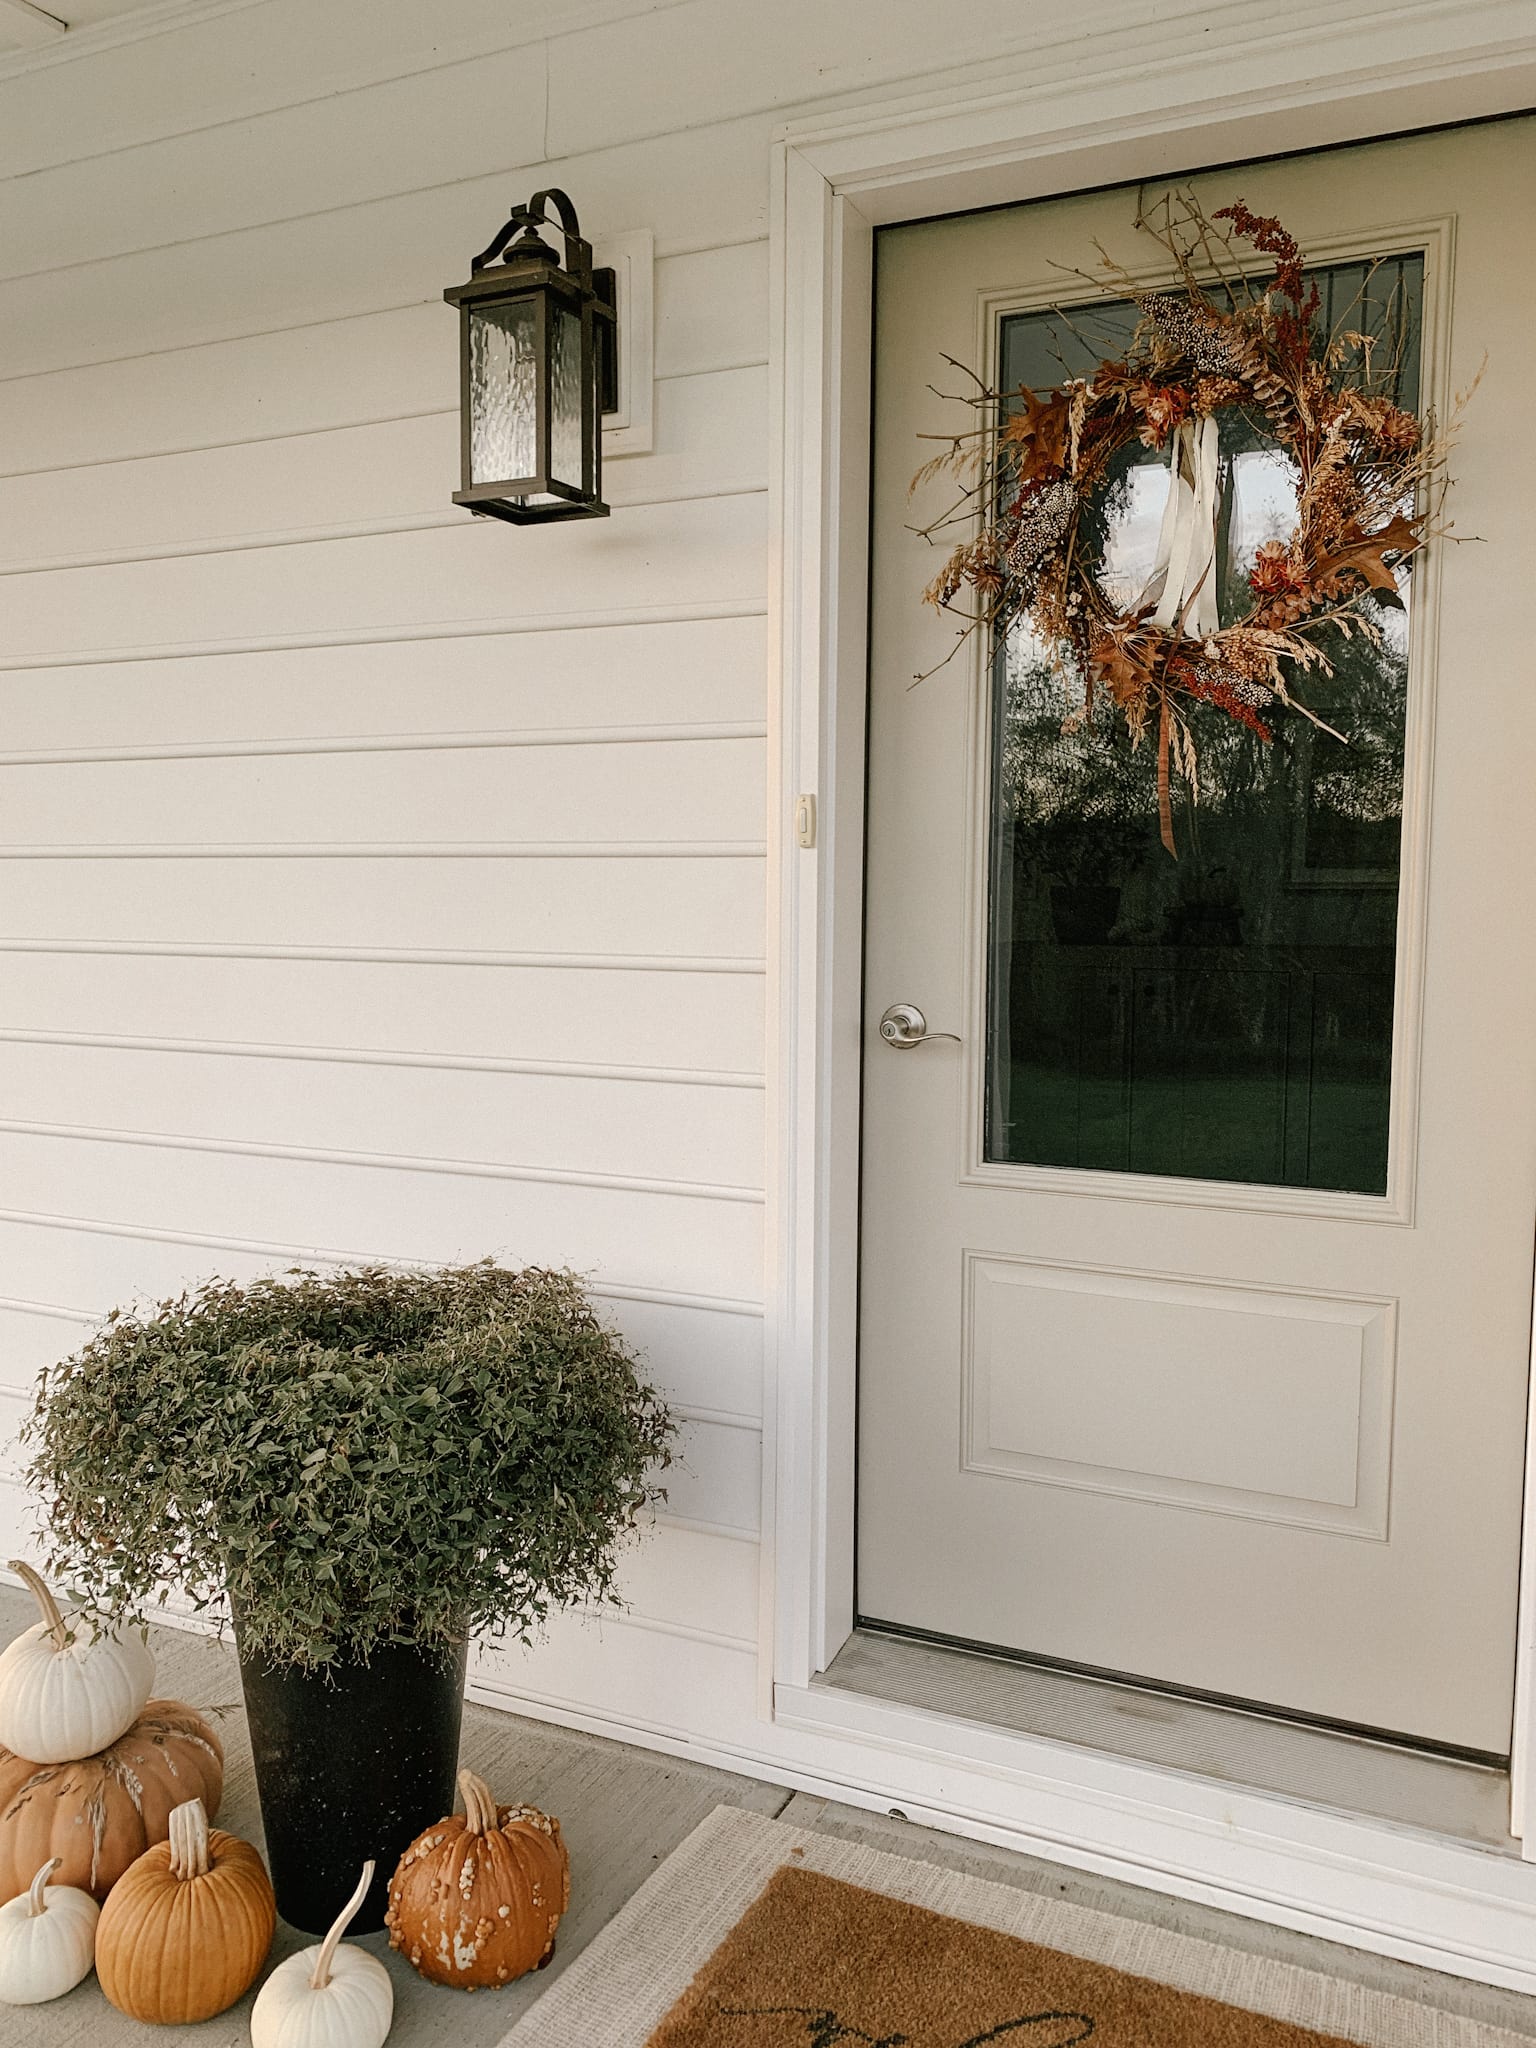
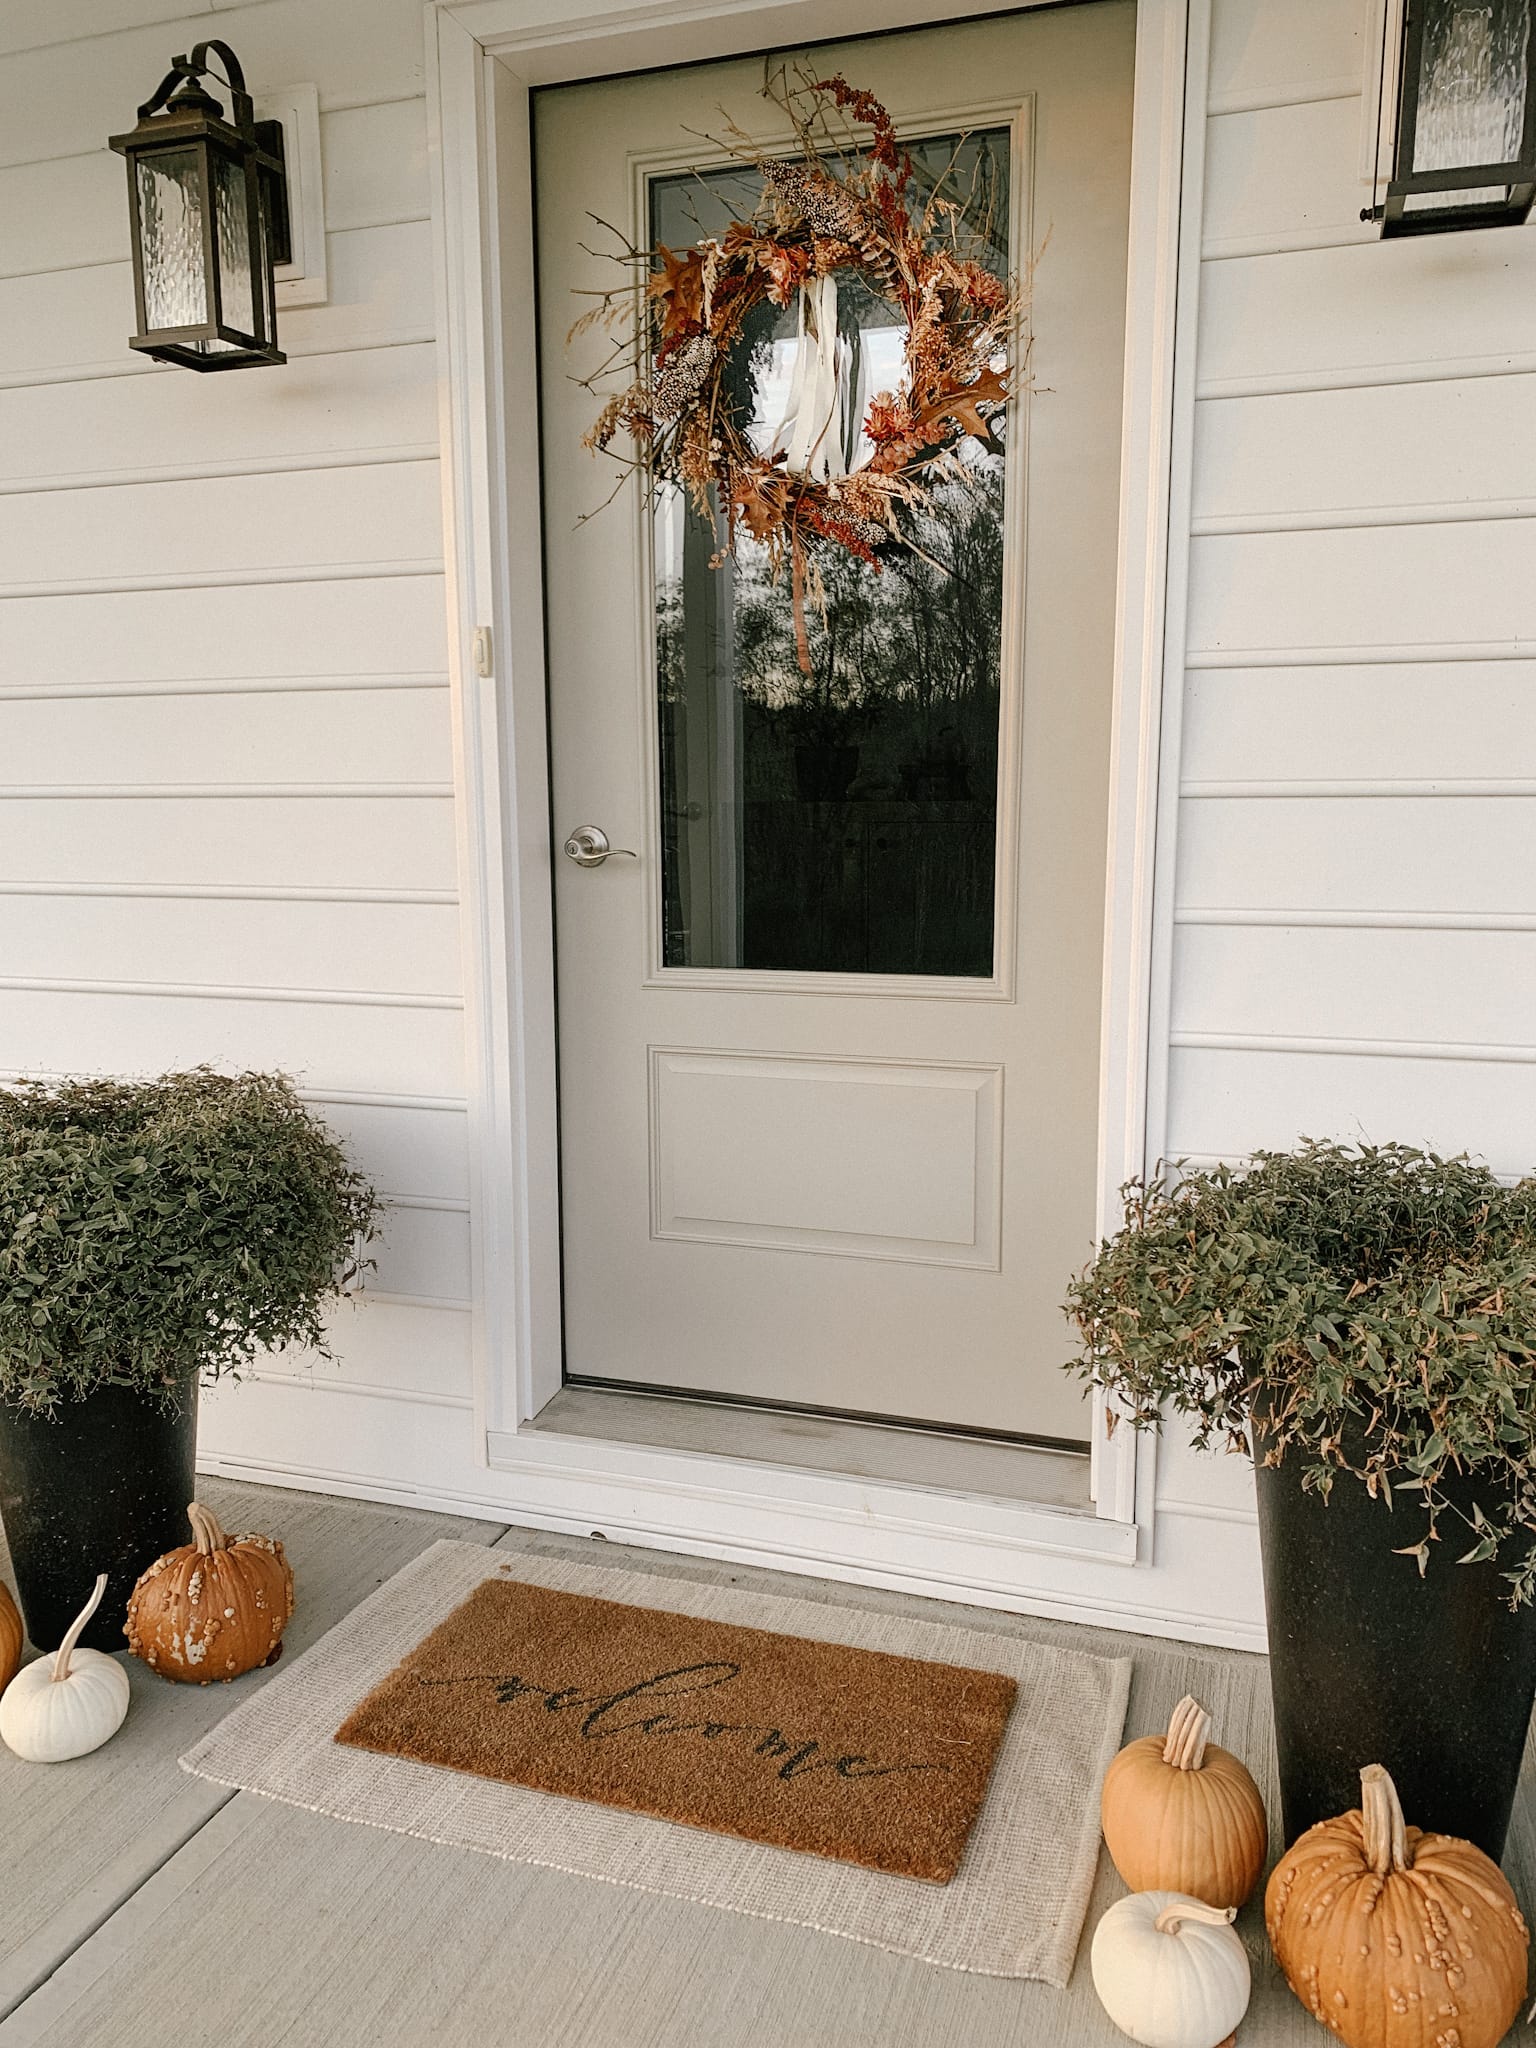
I sprayed it with a bit of hairspray to keep any loose particles from falling off. So far, it has held up wonderfully! To finish it off, I tied a few ribbons on the underside of the top of the wreath. I love how beautiful this looks when the wind blows.
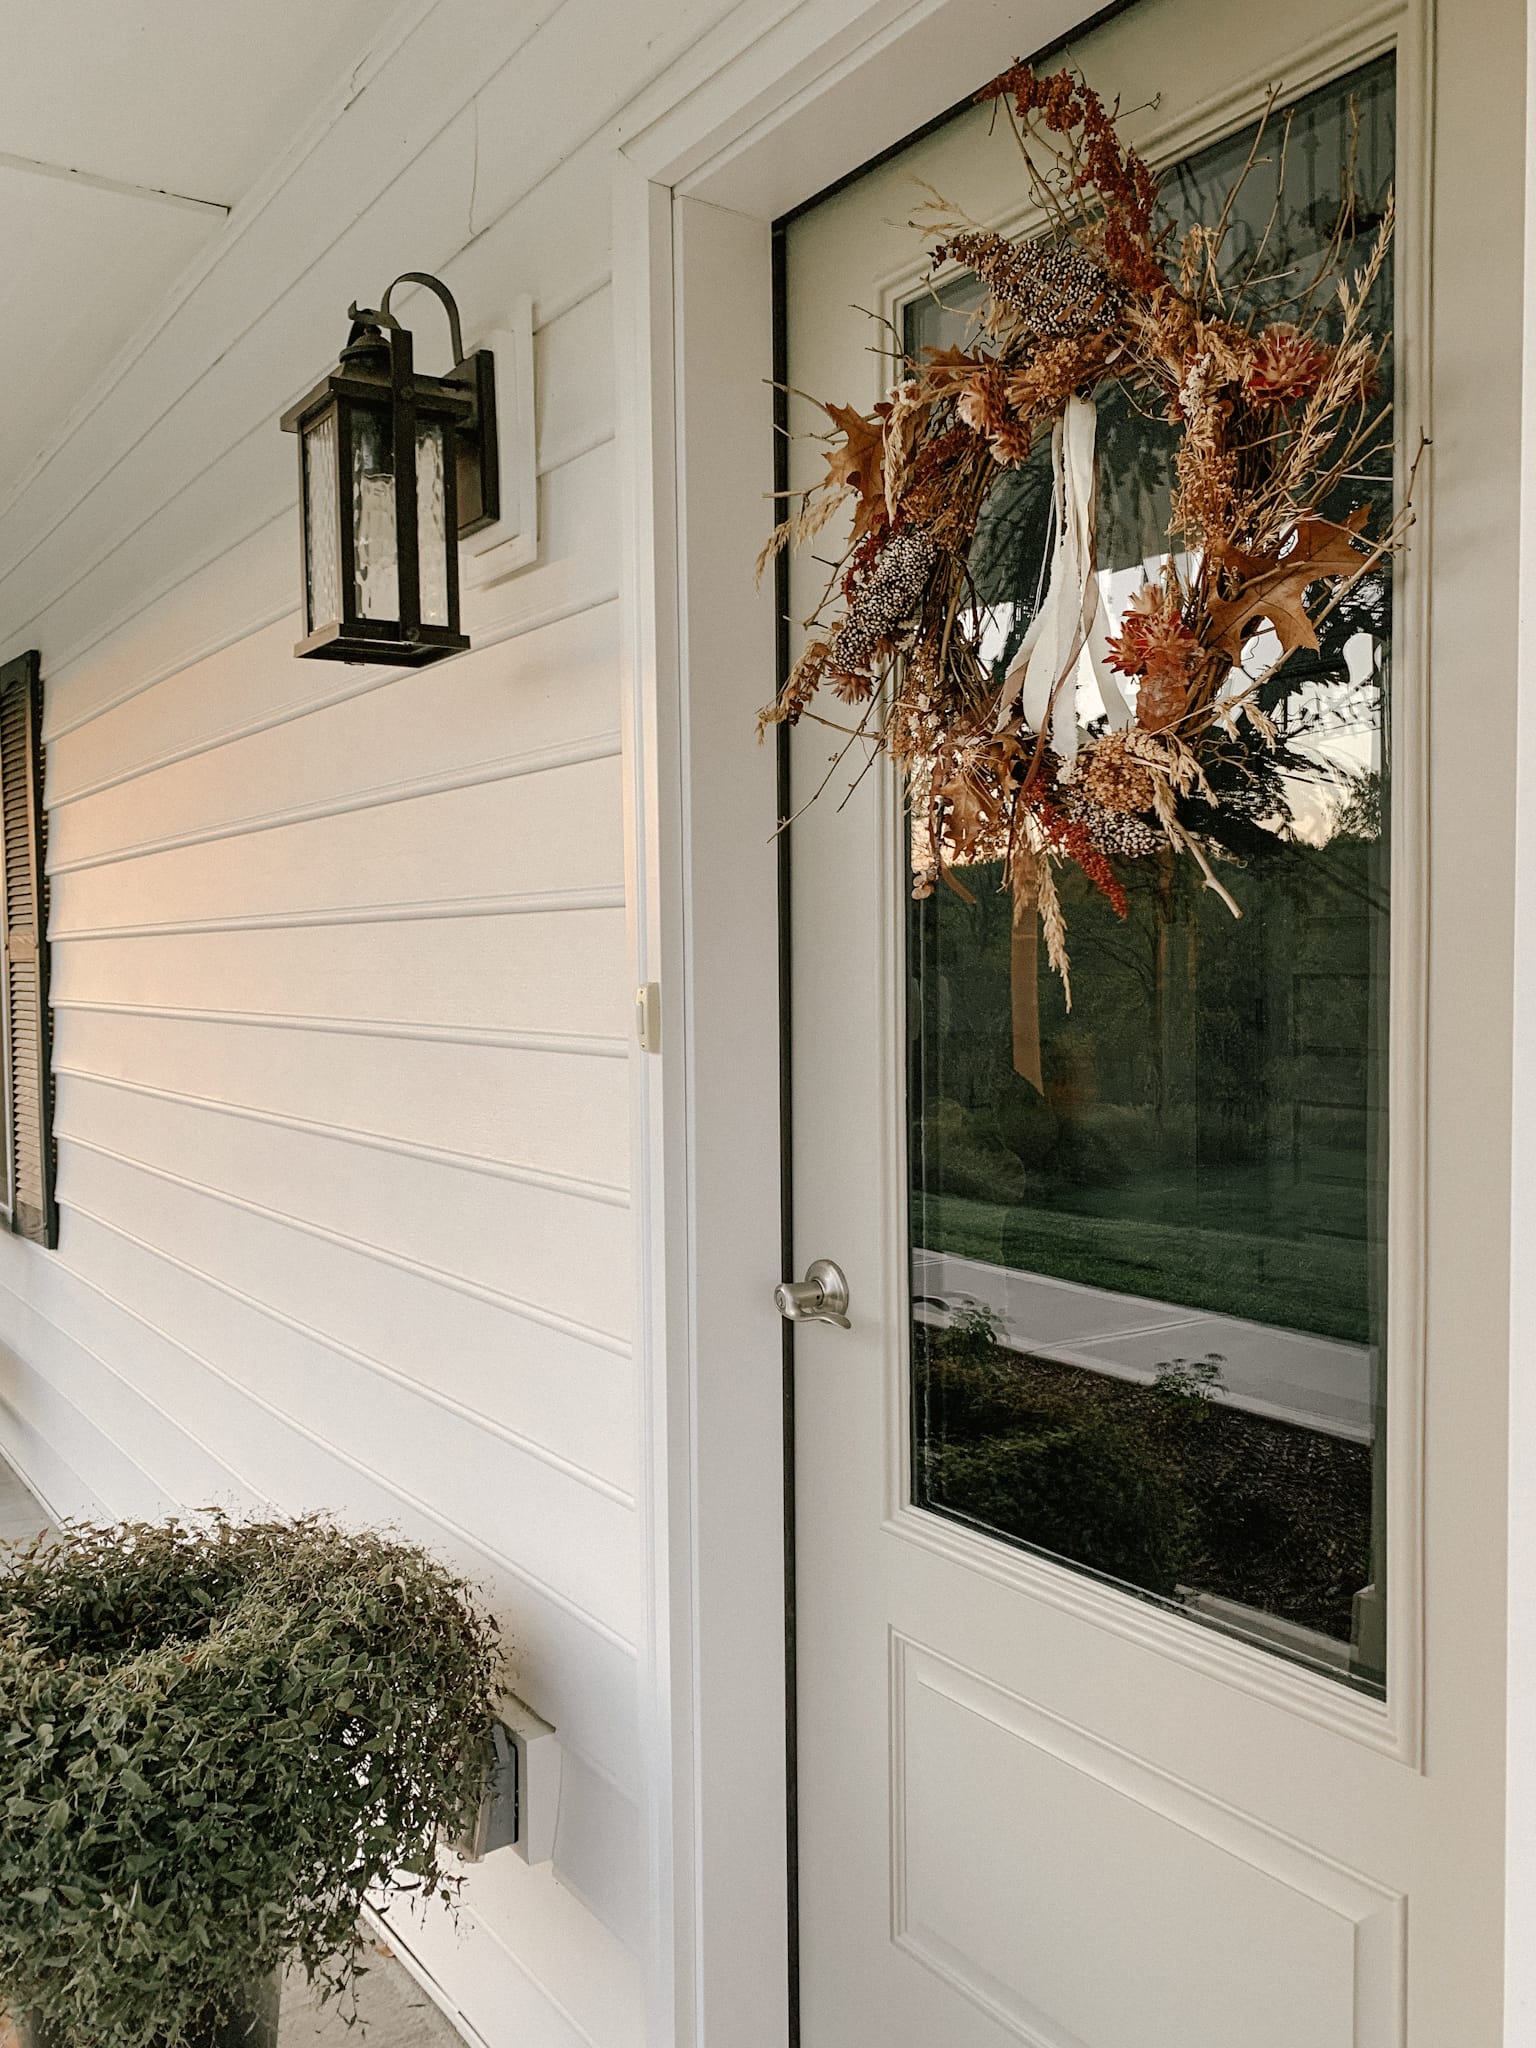
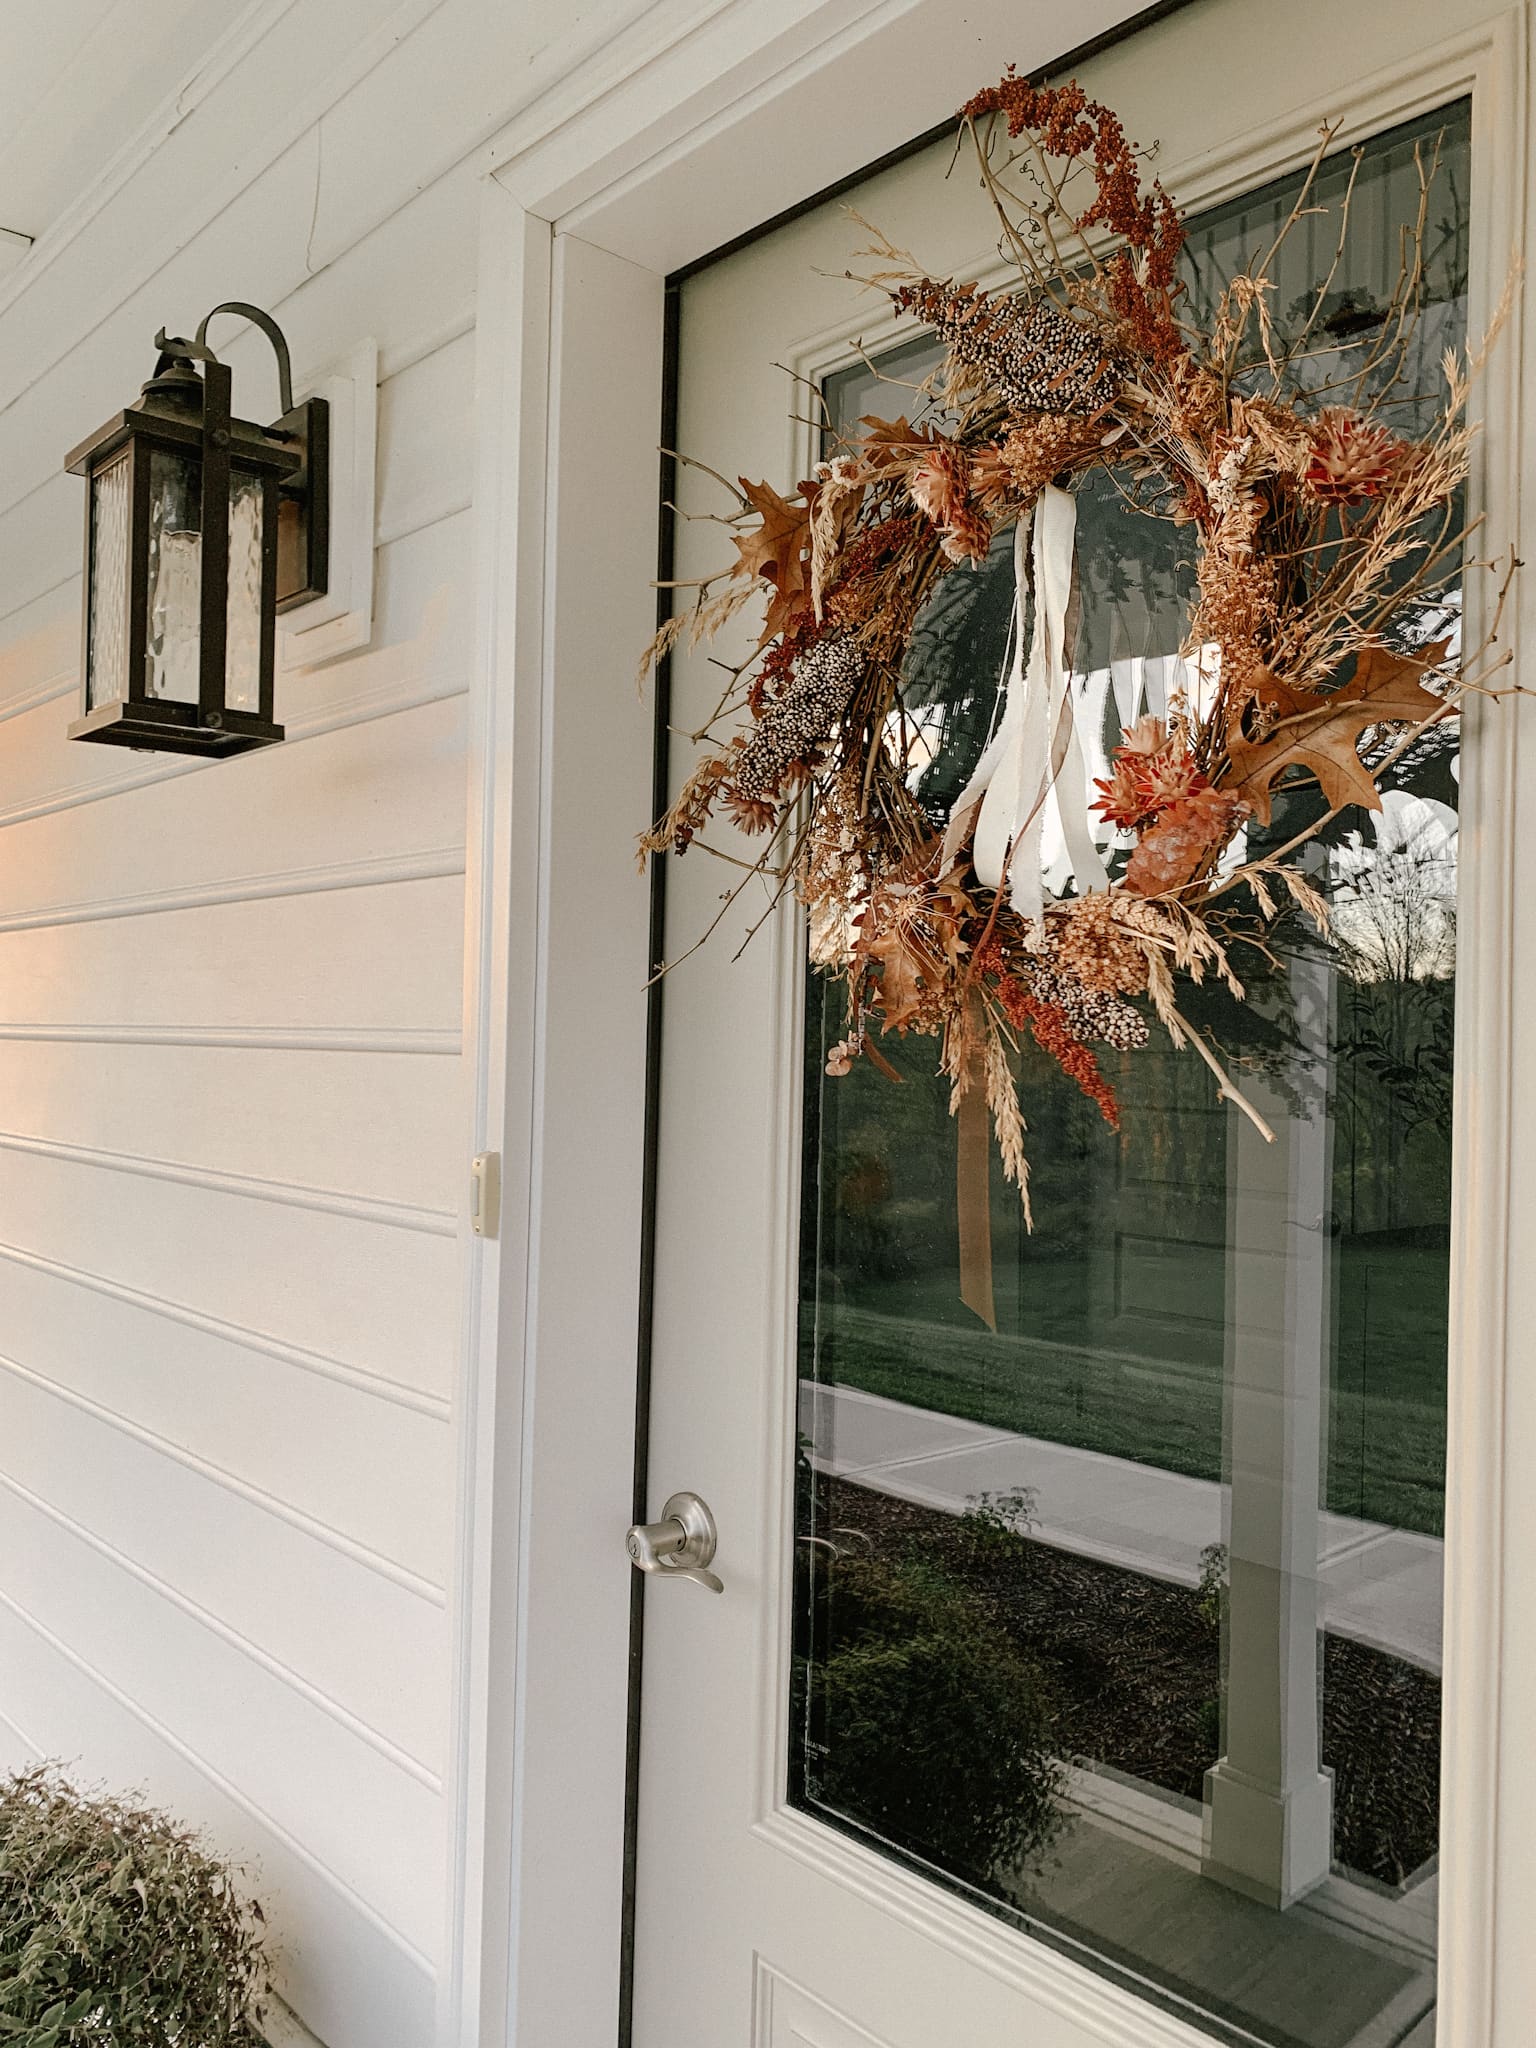
You can’t beat a cute and cheap option for fall porch decor. I am so happy with the neutral and natural vibe of this wreath. It compliments the rest of the porch beautifully. You can read more about this year’s porch decor and styling on this blog post!
I hope this DIY Fall dried floral wreath was inspiring to you! It was an easy project and very budget-friendly. Let me know in the comments below if you decide to try this project for yourself. I’d love to see your spin on it!

Leave a Reply